I actually used a very similar title back in August in a post where I described the storm that took out our power, TV, and our well pump. That was pretty destructive and disheartening, while this post is a little more literal. It’s about the actual steps up to the bedroom.
As everyone should know by now, I feel like I’m getting pretty good at the remodel work, itself. What I sort of suck at is estimating how long that work will take. We had been spending a great deal of time sanding drywall seams when Sandi landed a job at one of the local casinos. A little extra income will be nice, and I think she’ll enjoy meeting some local people. The down-side, obviously, is that my workforce has been cut in half. 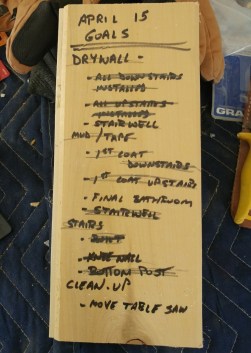 In anticipation of her first day at work on the 17th, we came up with a to-do list that we hoped to have completed by last Sunday. We wanted to put up the last few sheets of drywall in the living room, get everything taped and mudded, and get the resulting mess cleaned up.
Somewhere in that process, we decided the stairs leading up to the bedroom really needed some work. Our first move was to take down some of the shiplap that was on the wall going up the stairs. That led to a few patches and a little more taping and mud. We next turned our attention to the condition and construction of the staircase, itself.
All of the treads had old, very hard, adhesive residue. I suspect they had hardwood covering them at some point, but when the flooring was torn up, the ridges of glue remained. I tried sanding it down, chipping it away with a chisel, and basically just gave up. Unfortunately, they would need to be smooth in order to put new flooring or carpeting down. To make matters worse, several of the treads, made of 2″x12″ boards, were cracked and all 13 of them felt loose and creaky.


We had already removed the old balusters and handrail, so I set to the job of removing the old treads and risers and replacing them with new lumber and OSB. Instead of just securing them with a couple of nails (which caused the loose and creaky situation), I used plenty of adhesive, wood screws and shims to get them straight, level, and very solid.


 We’ve decided we’ll carpet the stairs, so I made the treads about 3/4 inch wider to allow for the carpet to be rolled over the edge. Finally, I built a knee wall along the right side and a sturdy ‘post’ at the bottom.
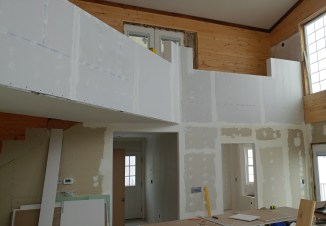
It’s all been covered with sheetrock and the seams have their initial coat of plaster. Sandi didn’t have to work yesterday, so she spent her one day off this week helping me scratch one of the last items off my list…. we cleaned up the sawdust. drywall scraps, and other assorted construction debris.
Aside from moving the table saw, we managed to get everything finished. As you might have noticed, yesterday was the 21st and the goals was to have everything done by the 15th. Hey, it was only a week behind. That’s definite improvement!
Now we need a nice day or two to cut another big hole in one of the outside walls. There is a small room on the main level that we’re calling the ‘sewing room’, though it may double as a small guest room, too. At some point, it may have been a bathroom and / or laundry room, but it’s been opened up and a small closet was added.  It still has an odd, little window where the bathroom used to be, and we think it’s going to look strange if we just leave it. So, the last thing we need to do is open that wall up, remove the two existing windows, and replace them with a single, larger window.
Obviously, that entails some new framing, some exterior siding patches, and a couple more sheets of drywall. We thought Spring was coming, but yesterday, we woke up to nearly 8 inches of new snow, so this project will have to wait a few days.
Fortunately, I hadn’t taken the blade off of the quad yet, so I was able to plow a path down to the gate so Sandi could make it to work this morning. Speaking of work, I should probably get down there and get started.
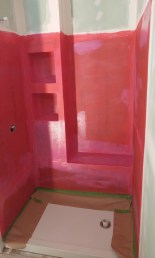
 The closet in the master bedroom (on the left in the photo) was pretty small, even though there is a 12′ x 20′ attic that has plenty of storage space. The problem (aside from the funky paint job) is access. The only way up there was a flimsy, fold down ladder.